

I absolutely love decorating for the holidays, but St. Pat’s is one that kind of got skipped in favor of Spring and Easter decorations. Not because I have anything agains’t St. Patrick’s Day, in fact I always enjoy some corned beef with my green died drink. Rather, there isn’t much available that isn’t cheesy or meant for a party. So, I have one little cross stitch clover I made a few years back that I hang on our gallery wall and move on.
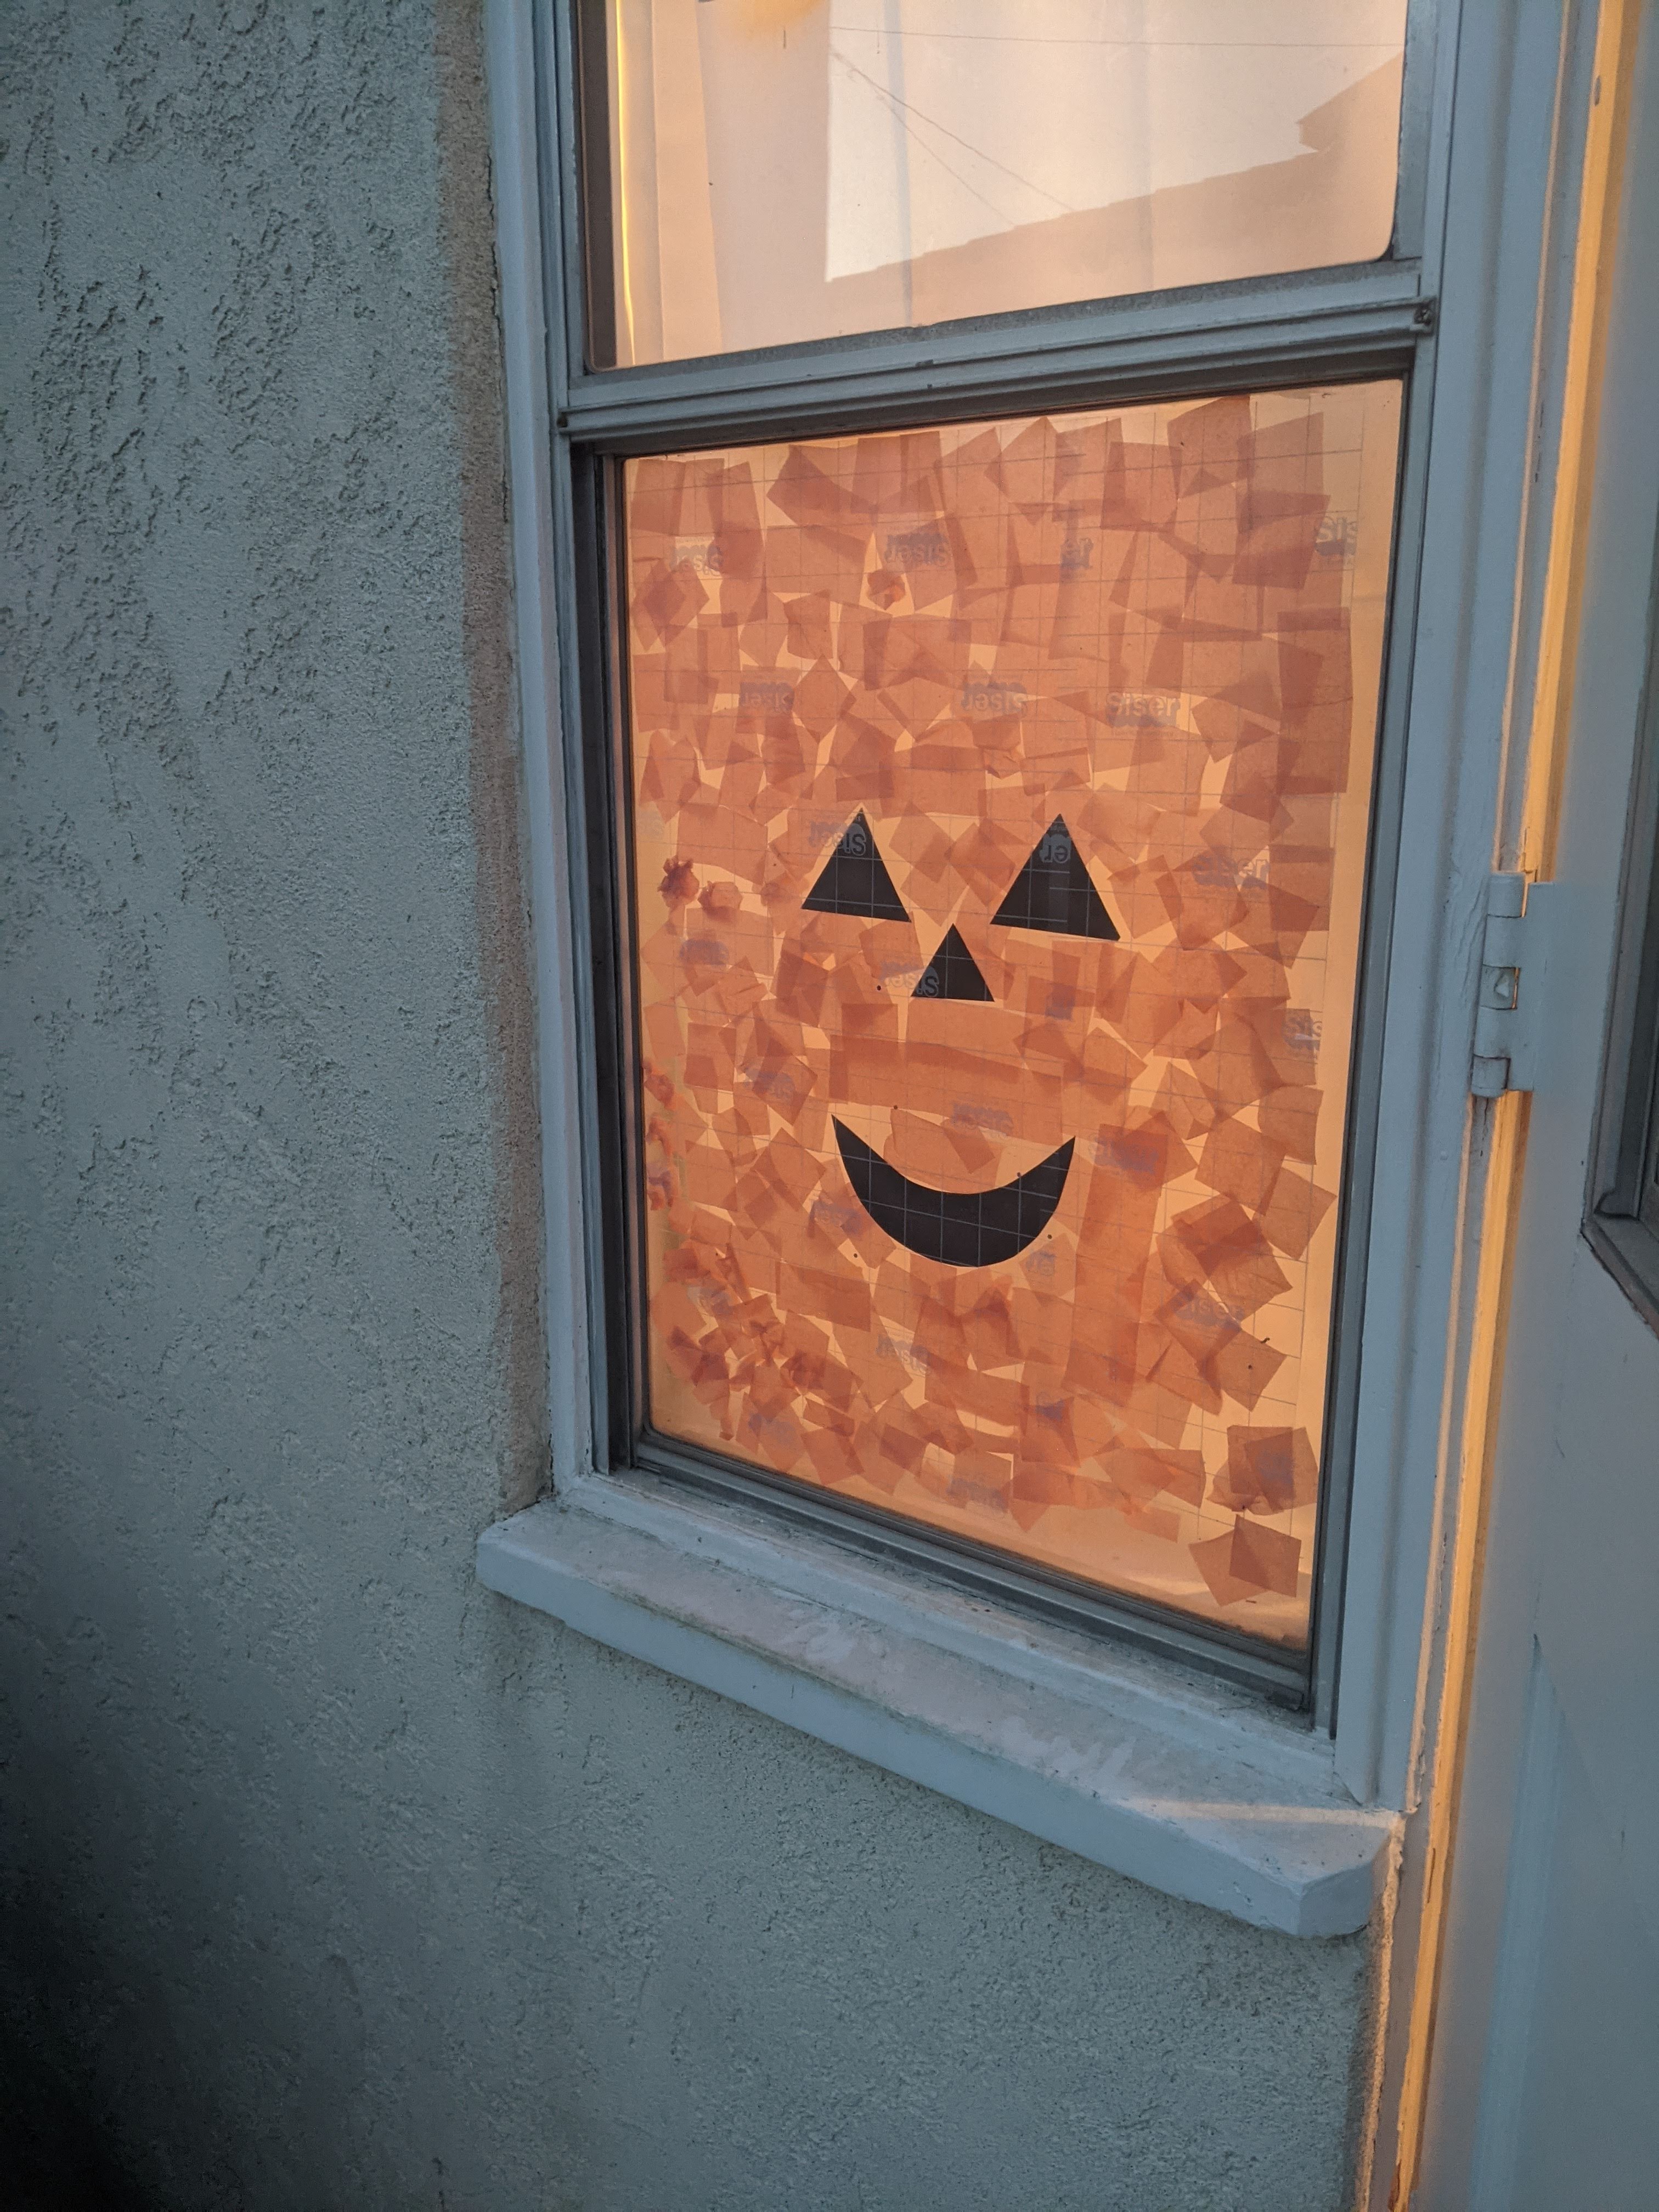
Since my oldest has started preschool, all holidays have become a much bigger deal….and I LOVE it! She has been asking about St. Patrick’s day a lot, especially since green is her absolute favorite color. We went to the store to look for some decorations, but nothing really stuck out as something I wanted to buy right now so I kind of moved on. Then I remembered our fun Halloween kitchen window. She absolutely loved helping me decorate. Kept her entertained while I put up some of my less kid friendly stuff.

Supplies
- Tissue paper
- Contact paper
- Construction paper
- Double Sided Tape (or regular clear tape, but will need to tape edges rather than backs)
Set up
The key words here…set up. This one is mostly about the kiddos. Once the contact paper is up, let them go for it! The hardest part is making sure your window is ready to go before they get involved. I suggest taking care of the prep while they are napping or away if possible (otherwise, like my girls you will have a lot of “help” that can make things challenging).
Cut the contact paper into the shape you want to make. This is where the tissue paper will stick.
Tape the contact paper to the window. Contact paper is only sticky on one side. The sticky side will need to face away from the window so the tissue paper can stick to it. I like to leave the backing on the paper as I apply it to the window. Place tape on the non-sticky side of the contact paper and stick to the window. Then peel the backing off.
Cut the Construction paper for the “solid” parts of your image. For the St. Pat’s window I used construction paper to outline the shamrocks and for the pot at the end of the rainbow.
Cut the tissue paper into squares/ pieces. This does not have to be perfect! Many of them get crumpled by little hands anyway 😉
Let them play
Time to call the kiddos over and let them add the tissue paper to the window. It will only stick to the contact paper so, no matter what colors they use by the end you will have a great image! It can also be a fun color matching game. I put a couple pieces of the colors on each band of the rainbow and the girls followed the pattern.
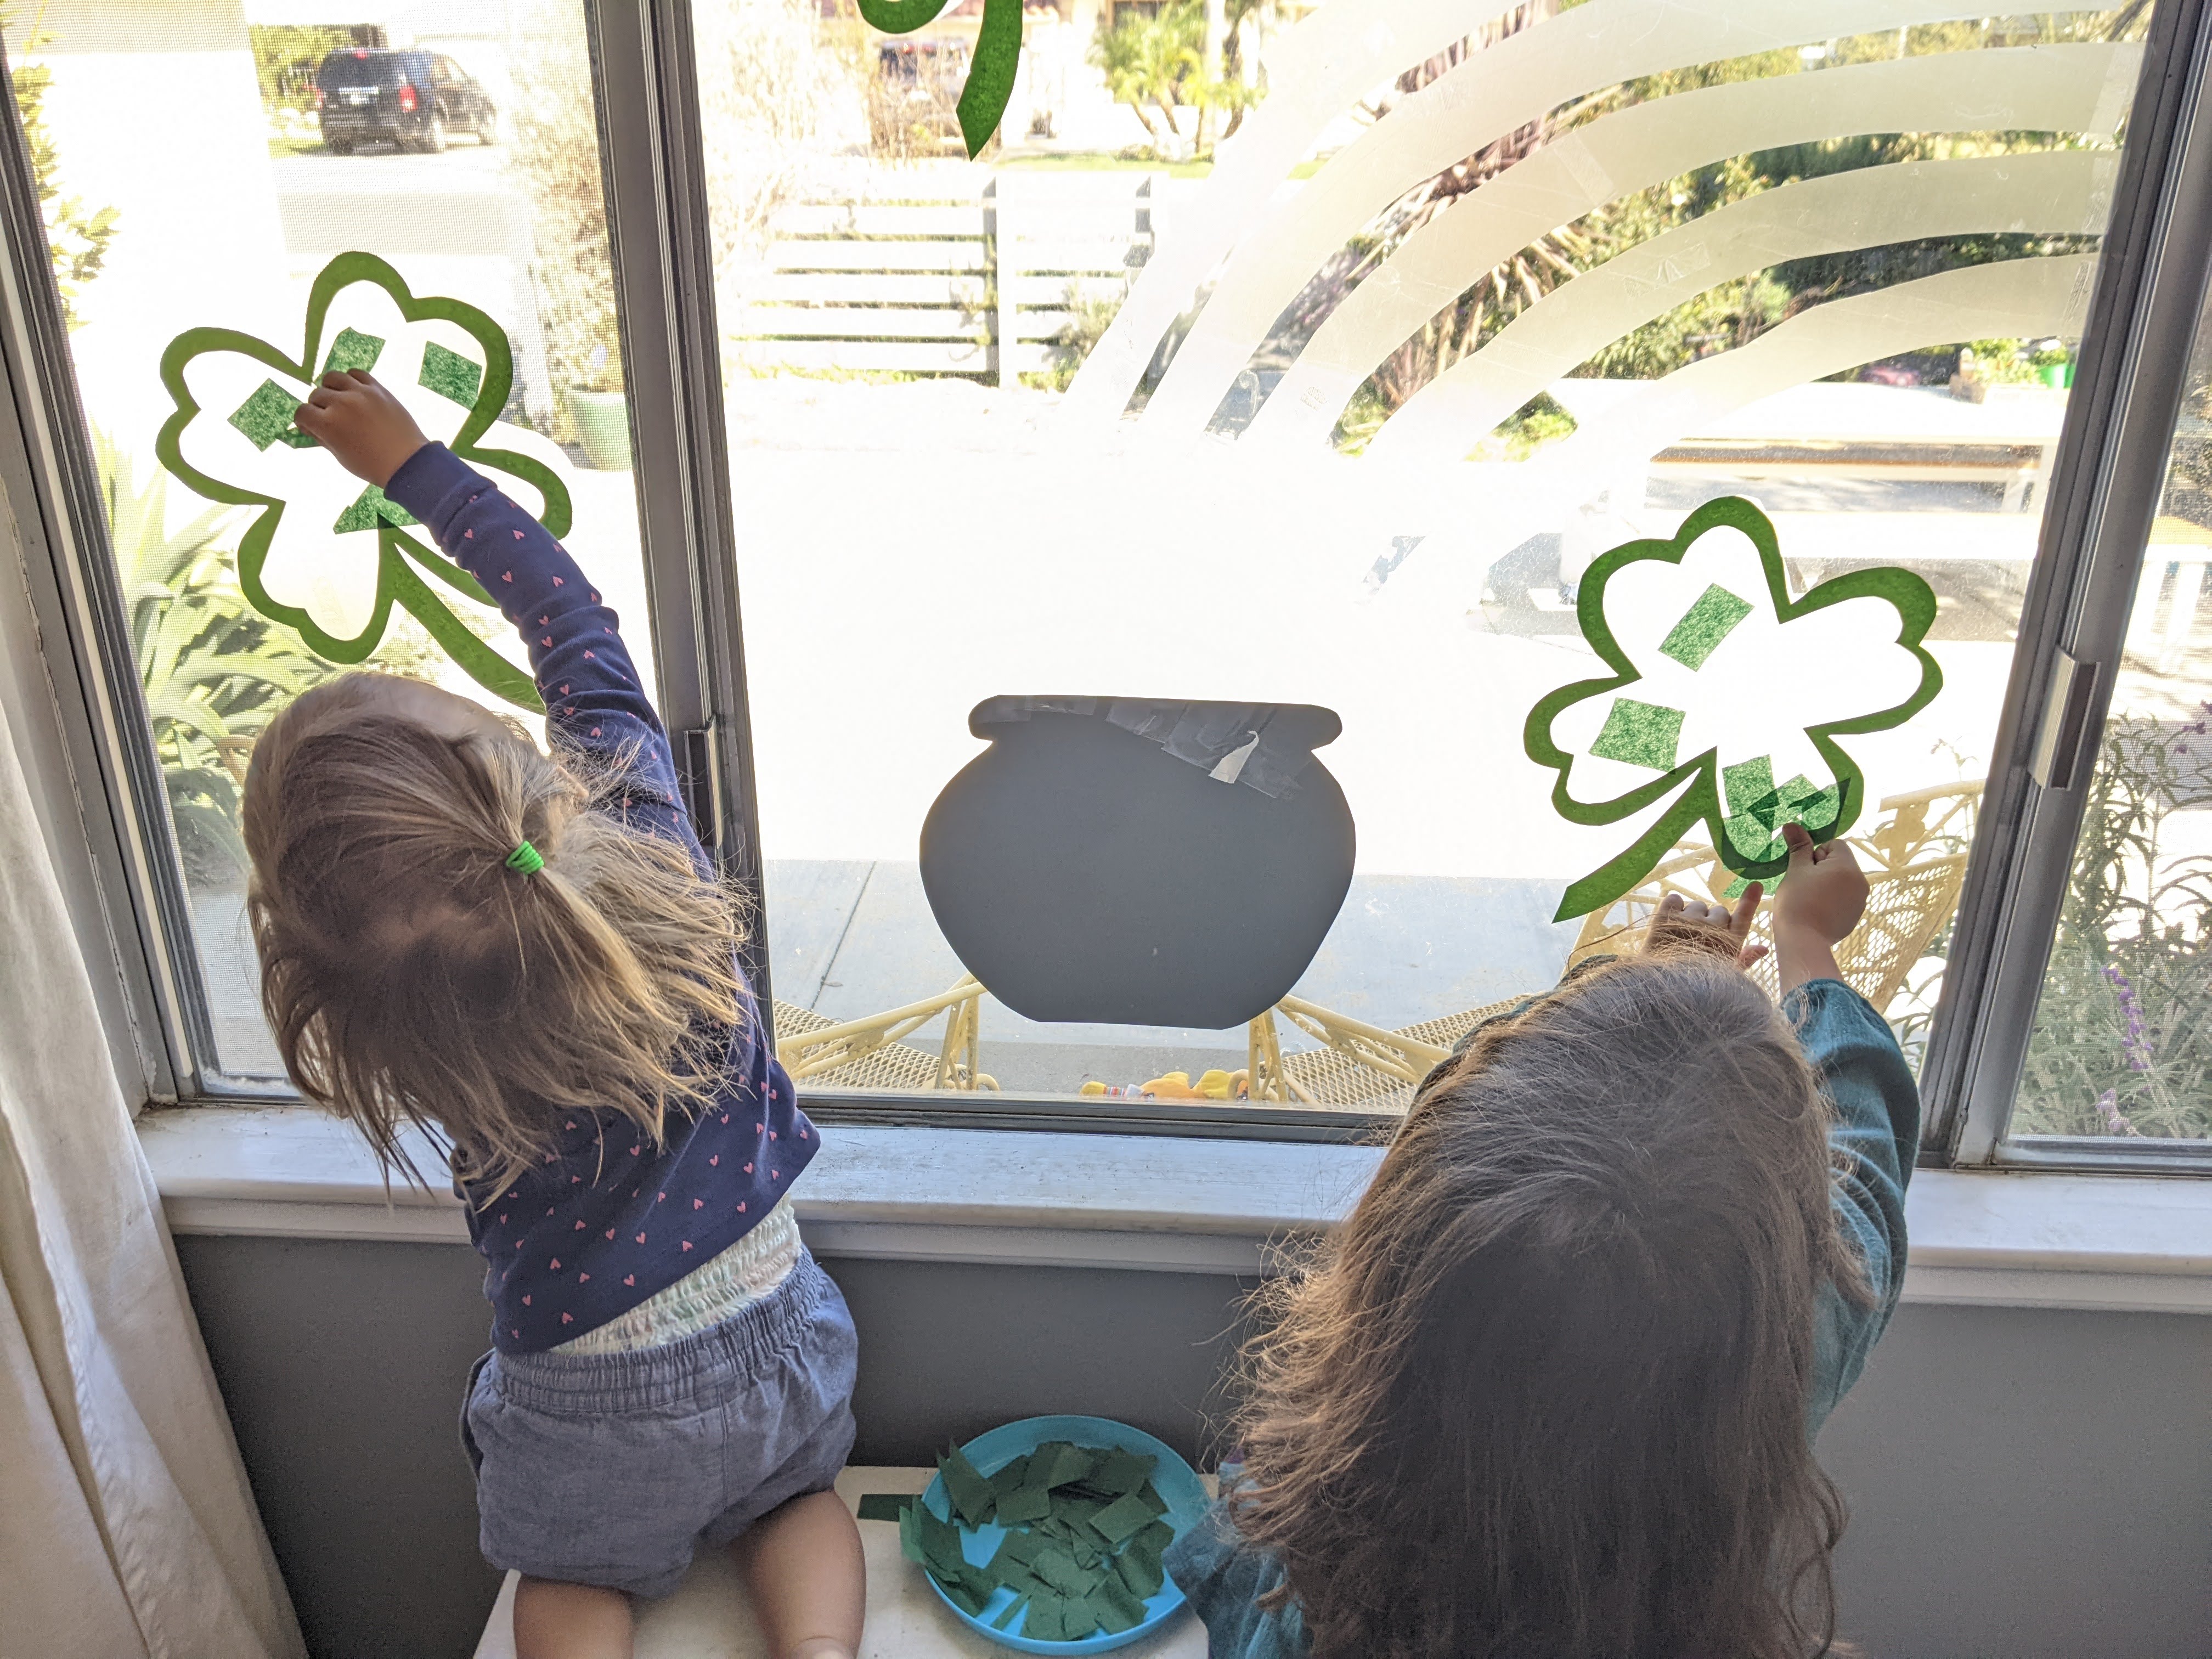
This absolutely does not have to be perfect! They had so much fun and love seeing their work proudly displayed in our front window.
The whole project took about an hour….20 minutes for me to set up and about 20 minutes for them to complete (hey, if I can get them to do something together for 20 minutes without my involvement…win!). The clean up, another 20….but I will admit, I totally bribed… I mean, rewarded…I mean had Caley EARN a mini cookie after she picked up ALL of the scrap tissue paper 😉
A word of caution though…the tape can be hard to remove from your window depending on what you use. I have OLD windows and we are getting ready to remodel so we are just going for the messy stuff these days. You can always used masking tape if you are concerned about the tape residue.
Happy St. Patrick’s Day!


Leave a comment